


Looking for a creamy and moisturising soap? Our shea butter soap recipe is just the ticket!
Shea butter is a luxurious ingredient and super moisturising, which makes it perfect for dry skin.
To make your creamy shea butter soap, you can use our simple silicone moulds for a classic looking soap bar. We used the cold process method in this recipe, read on to find out more!
What is shea butter soap good for?
Shea butter soap is good for dry skin as shea butter soap is very moisturising. It is also gentle and, if left un-fragranced, it is great for sensitive skin.
What percentage of soap should be shea butter?
Shea butter is quite soft and doesn't add to the lather of the soap which is why it is often used in lower quantities. We'd suggest a maximum of 20% shea butter in shea butter soap.
Our shea butter soap recipe has 20% shea butter and we pair it with castor oil to boost the lather.
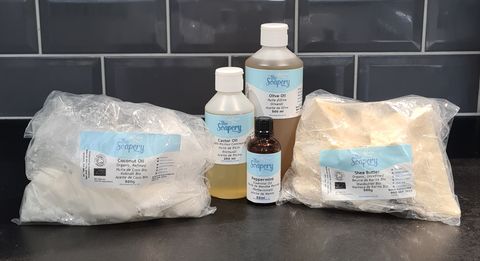
What are the ingredients in shea butter soap?
- 180g | 195ml olive oil
- 90g shea butter
- 144g coconut oil
- 36g | 38ml castor oil
- 135g water
- 63g sodium hydroxide
- 13g | 13ml peppermint essential oil
This unrefined shea butter soap recipe will make around 6 x 100g bars.
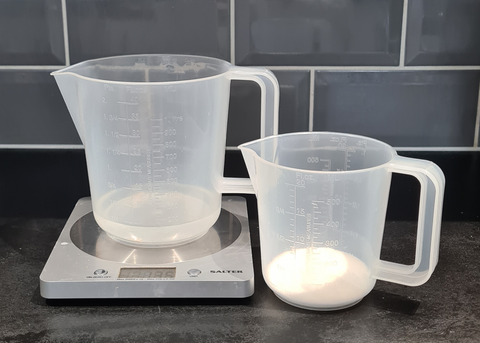
Equipment:
- Gloves
- Goggles
- Weighing scales
- Hand blender
- A 6 cell silicone rectangle bar mould or line a small, cardboard box with greaseproof paper
- 2 x 1 litre plastic measuring jugs and 1 smaller jug for the essential oil
- Silicone or stainless steel spatula
- Digital or jam thermometer
Safety Note: When working with sodium hydroxide you must wear gloves and goggles at all times. It is a caustic product and will burn. In the event of getting it on your skin, rinse well with plenty of plain water. If it is splashed in the eyes, wash with water and seek urgent medical attention. Keep away from pets and children at all times.
How to make shea butter soap
1. Weigh and mix your water and sodium hydroxide
- Weigh your cold water into one of your jugs and place to one side
- Pop your safety gear on - goggles and gloves
- Weigh the sodium hydroxide into one of your jugs.
- Pour the sodium hydroxide into your water jug, not the other way around. Take care to do this in a ventilated area as it will give off fumes for a few seconds once you begin to stir. Stir for around 10 to 15 seconds until completely dissolved with your silicone/stainless steel spatula. Place safely to one side. It will be too hot to use at the moment.
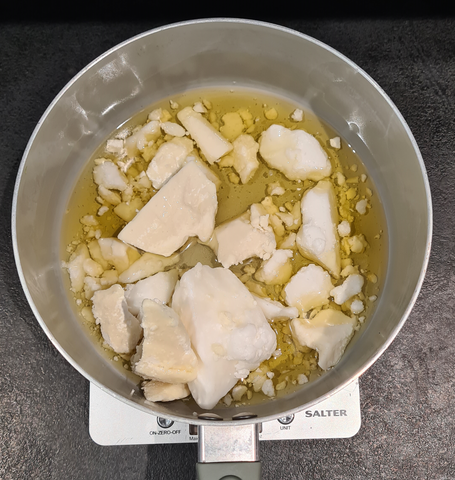
2. Weigh and heat your oils
- Weigh out the olive oil and castor oil into a 1 litre jug.
- Weigh your coconut oil and shea butter into your remaining 1 litre jug
- Melt your coconut oil and shea butter in the microwave (or on the stove top in a saucepan) until they are at 40°C.
- Ensure that the shea butter and coconut oil are properly melted oils before combining them with the castor and olive oil.
- Weigh your peppermint essential oil into a separate jug
3. Check the temperature of your oils and water
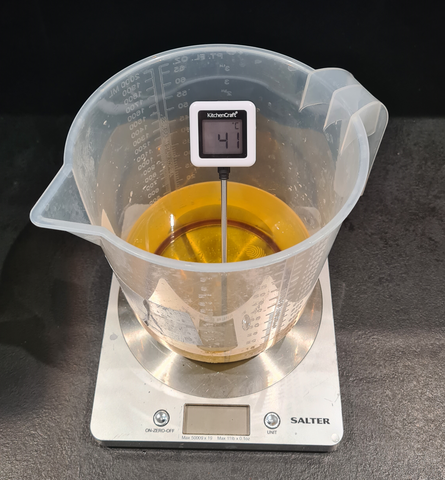
- Test the temperature of your sodium hydroxide solution with your thermometer, you need it to cool down to around 40°C. Please note - do not reheat your sodium hydroxide solution if it is too cool, heat your oils a little more to compensate instead
- Pour your melted oils, including coconut oil and shea butter, into the jug that contains your olive and castor oils and mix.
- Test the temperature of your combined oils. They need to be around 40°C. If they need to be warmed a little then pop them back in the microwave.
- Pour your essential oils and then your sodium hydroxide solution into your oils.
4. Blend until trace
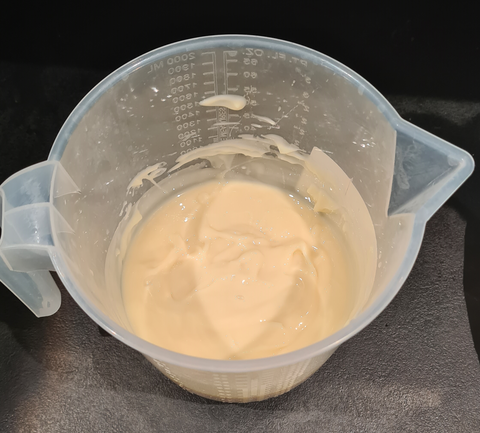
- Be prepared to work quickly, our mixture reached trace quickly. You can see a heavy trace in our picture above. Ideally you want to stop before it reaches this stage.
- Stir gently with your hand blender and then blend until it reaches a light to medium trace. This means you have a mixture that has thickened up a little and when you drizzle a little of it across the top of the jug of mixture it sits on top for a moment. You are looking for a pourable mixture but not a thick blancmange like texture.
5. Pour into your moulds
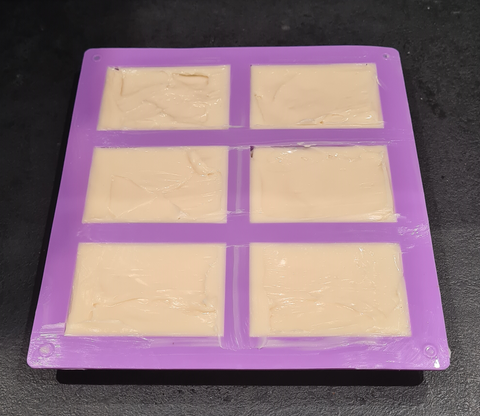
- Pour into your mould. Top tip - if it’s a cold day pop the mould in a cardboard box and wrap in a towel to keep it warm to aid the saponification process.
- Leave for 2 days before unmoulding.
- Place somewhere with a good airflow between bars so they can cure. You can put in a cardboard box just make sure they are not touching. Your soap will be ready to use within 4 to 6 weeks.
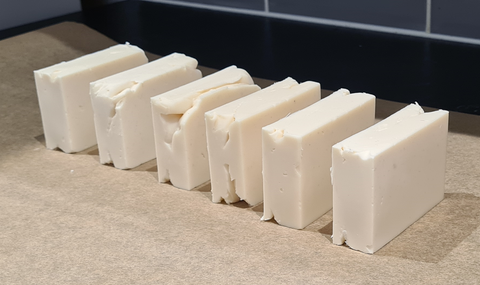
Here's our finished bars. We had to scoop it into the mould because we blended it too much, that's why there's gaps in the soap:
Shea butter soap recipe note: This is made with a 5% superfat and 30% water.
FAQs
Does shea butter make a hard soap?
Shea butter does make a relatively hard soap. The finished bar isn't as hard as coconut soap, but it is a lot harder than olive oil soap.
Can you make soap with just shea butter?
Yes, it is technically possible to make soap with just shea butter. However, you won't get a great lather. To get a better lather, we've paired our shea butter with castor oil and coconut oil in this soap recipe.
Continue reading
Now that you've tired our shea butter soap recipe, continue on your natural beauty journey!
- Try our other cold process soap recipes
- Interested in hot process soap making? Try our easy hot process soap recipe
- Would you like to make your own shampoo? Try our simple shampoo bar recipe
- Learn more about our shea butter with this blog!
How did find out shea butter soap recipe? Comment below and let us know.


1 comment
I loved making this soap and am delighted with the finished product! I am a beginner and found the instructions very clear and easy to follow. Thanks so much😊